
No products in the cart.

Halloween Gifts
Best Halloween Window Decorations for 2026: A Complete Buying and Styling Guide
07
Sep
Sep
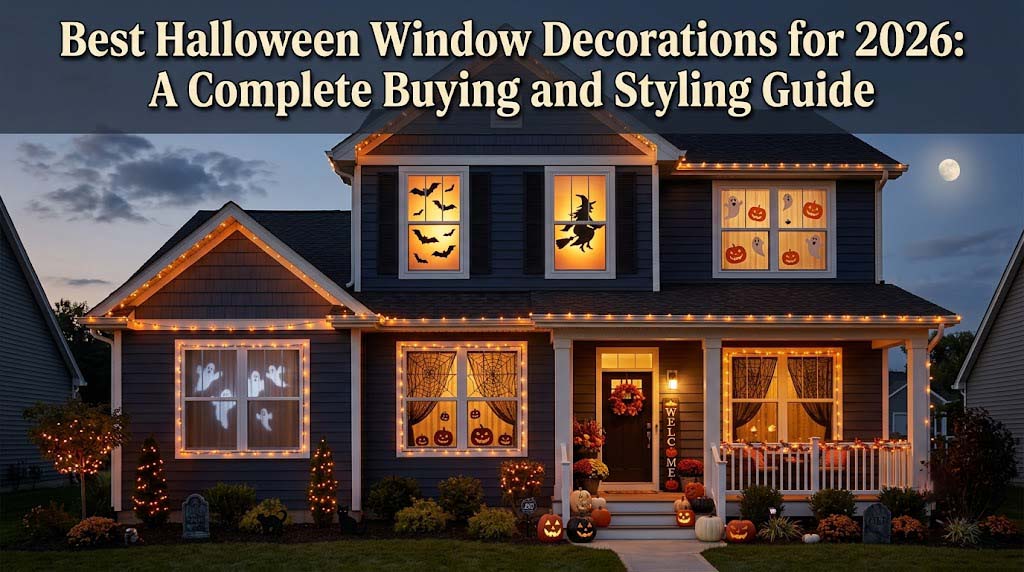
Halloween decorating usually starts at the front door, but the windows are often what people actually notice from the street after dark. Choosing the right Halloween window decorations means balancing visual impact with a few practical questions: will it damage the glass, will it hold up if the weather turns, and will it still look intentional rather than cluttered once the porch lights and yard props are added too. Below, we walk through the main categories of window decor, how to choose between them, and the installation and safety details that are easy to skip until something goes wrong.
Best Halloween Window Decorations at a Glance
Compare the main window-decor categories
Window decor generally falls into a handful of categories: flat silhouettes and posters, static clings and decals, fabric curtains and panels, string lights, and projection effects. Each behaves differently once it’s actually on the glass — a silhouette that looks dramatic in a product photo can read as flat and lifeless without a light source behind it, while a decal that seems sturdy can loosen the moment the window gets any condensation.
We’ve found it helps to think about each category in terms of effect, placement, and effort rather than just appearance. Silhouettes and posters deliver the strongest nighttime silhouette effect; clings and decals are the fastest to apply and remove; curtains and panels do double duty as both decor and light control; and lighting or projection adds movement that flat decor can’t.
Best option by goal
If you’re renting or don’t want to risk your window frames, static clings and lightweight fabric panels are the safer starting point. If your priority is nighttime curb appeal, backlit silhouettes tend to outperform anything that relies on daylight to read well. And if budget is the main constraint, a single well-placed focal window usually looks more polished than spreading a small decor budget across every pane in the house.
If you’re still working out how many days is it halloween this year, that countdown is worth checking before you commit to anything with a long lead time — some fabric panels and lighting sets take longer to source than a same-day decal run.
What to check before buying
Before adding anything to a cart, it’s worth confirming the window’s actual glass dimensions, whether the product is rated for indoor or outdoor use, how it’s meant to be mounted, and whether it needs a power source nearby. These details matter more for window decor than most other Halloween categories, because a mismatch here usually means either a return or a piece that never quite looks right once it’s up.
How to Choose Halloween Window Decor for Your Home
Measure the glass and frame area
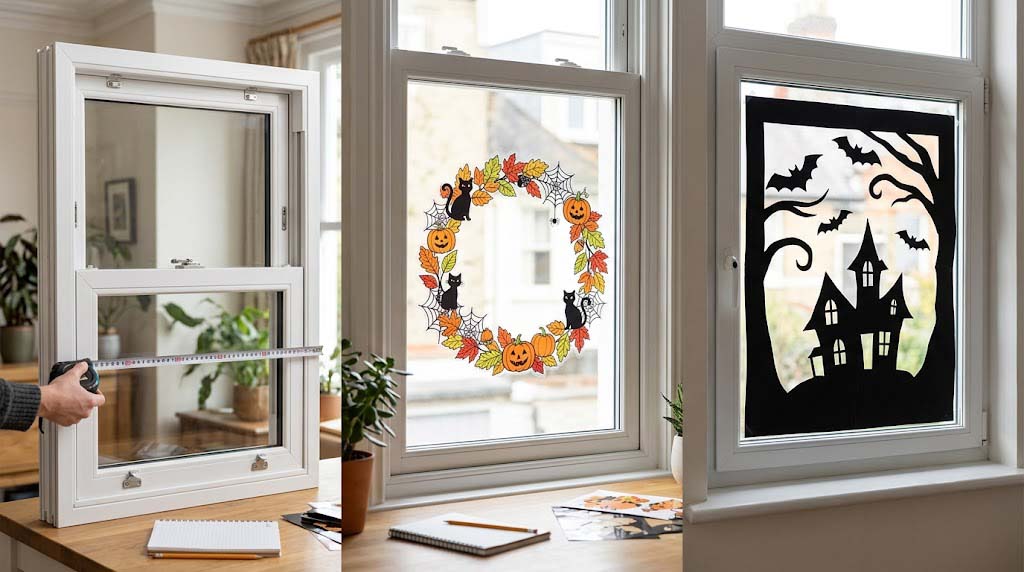
It’s easy to eyeball a window and guess at size, but glass area varies a surprising amount between homes — even windows that look similar from across a room can differ by several inches per side. Measure the visible glass, not just the frame, and leave a small margin so the decor doesn’t crowd the sash, the lock, or a window that opens outward.
If the window is one you or a family member regularly opens, factor that clearance in before buying anything that spans the full pane. A decoration that has to be removed every time someone wants fresh air tends to get taken down early and never put back up.
Choose a daytime or nighttime effect
Some window decor is designed to be seen in daylight — a wreath-style cling or a garland reads fine at any hour. Silhouettes, backlighting, and projection effects work differently: they’re essentially invisible until the sun goes down and a light source is switched on behind them. Neither approach is better, but it’s worth deciding which effect you actually want before buying, since the two rarely deliver on both fronts at once.
Match the decor to the room and street view
A window facing a busy street calls for a different tone than one that only faces a side yard. Consider who’s actually going to be looking at it — trick-or-treaters at eye level, neighbors driving past, or family inside the room — and let that shape how intense or subtle the design is. A nursery or kids’ bedroom window usually calls for a softer, less startling look than a living room facing the sidewalk.
Halloween Window Silhouettes and Backlit Scenes
Choose a silhouette subject
Window silhouettes work best when the shape reads clearly from a distance — a witch’s profile, a skeletal hand, bats in flight, or a haunted house outline all hold up better than busier, more detailed scenes that blur together once backlit. Simpler silhouettes with strong, unbroken outlines tend to look more deliberate at night than ones packed with fine detail that only shows up up close.
Graveyard and haunted-house scenes are popular because they scale well across a full window, but a single striking figure — one large bat, one witch — often has more visual punch than trying to fill the whole pane.
Try the parchment paper and trash bag trick
If you’d rather not buy a silhouette kit, there’s a well-known DIY version of the same effect. Taping parchment or wax paper across the inside of the glass creates a frosted, diffused look that softens the light coming through, and cutting simple ghost or figure shapes out of black trash bags gives you free-form silhouettes to layer on top. It’s inexpensive, fully removable, and easy to redo if a shape doesn’t turn out the way you pictured it.
The same backlighting principle applies here as with a store-bought silhouette — a lamp or light placed behind the paper is what makes the whole thing glow from outside after dark.
Create the backlighting effect
The backlighting is what actually makes a silhouette work, whether it’s a purchased piece or a DIY paper one. Placing a lamp, string lights, or a small spotlight behind the piece — rather than in front of it — is what creates the sharp, high-contrast look from outside. It’s worth checking that any light source used this way is rated for the fixture and distance involved, and that no paper or fabric decor is resting directly against a bulb or heat source.
Dimming or turning off other lights in the same room usually sharpens the effect further, since competing light sources tend to wash out the contrast that makes a silhouette read as dramatic from the street.
Secure and align the scene
Once the piece is positioned, it’s worth stepping outside to check the angle from the sidewalk before finalizing the placement — what looks centered from inside the room doesn’t always look centered from the street. Keep any cords tucked along the frame rather than draped across the glass, and avoid covering the entire window if it’s one that would be used as an emergency exit from a bedroom.
Window Clings, Decals, and Removable Halloween Art
Static-cling versus adhesive decals
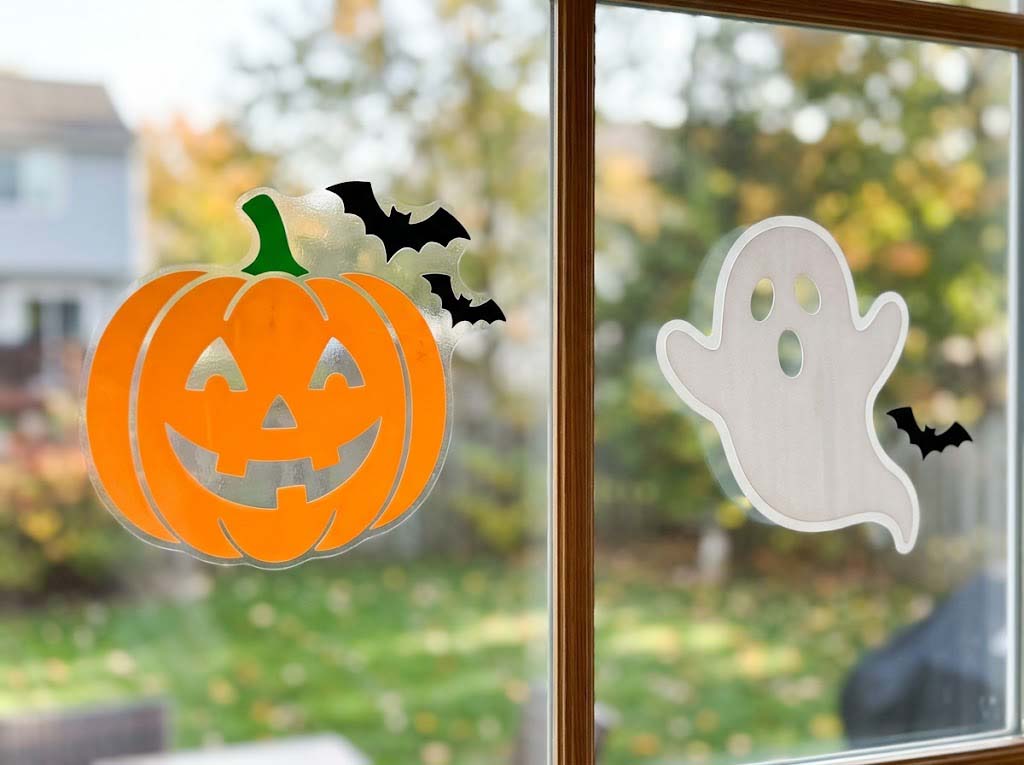
Static clings rely on a light electrostatic hold rather than glue, which makes them the more forgiving option for renters or anyone who wants to reposition pieces without residue. Adhesive decals stick more firmly and tend to survive wind or a bumped window better, but they hold up worse in heat than most people expect.
Last fall, we put an adhesive decal on a window that gets direct afternoon sun facing west. By the time October’s warm afternoons rolled around, the glue had softened enough that the decal started sliding, and it took us close to two hours to scrape the leftover adhesive off the glass afterward. If your window gets strong afternoon sun, a static cling avoids this problem entirely — there’s no glue in it to break down in the heat.
Arrange multiple clings without visual clutter
A common mistake is scattering too many small clings across a window with no clear focal point — from a distance, it tends to read as noise rather than a scene. One larger piece as the anchor, with a few smaller accents around it, generally looks more intentional than a dozen scattered evenly across the glass. Leaving some open space also keeps the window from going completely dark during the day.
Test removal before covering the whole window
Before applying decals across an entire window, test one piece in an inconspicuous corner and leave it for a day or two to see how it holds up. It’s a small step, but it’s the easiest way to catch a problem — like the heat issue above — before it affects the whole window instead of one corner of it.
Curtains, Garlands, and Hanging Window Decor
Halloween curtains and window panels
Fabric panels — spiderweb lace, sheer black overlays, printed curtains — offer a different kind of impact than flat decor. They soften the light coming through during the day and can be swapped in and out easily since they typically use the same rod or clips as your regular curtains. They’re also one of the easier categories to machine wash and store for reuse the following year.
When shopping for these, it’s worth checking the listed width and length against your actual window rather than assuming a “standard” size will fit, since curtain proportions vary more than most people expect.
Hanging ghosts, bats, and garlands
Hanging pieces — paper bats on fishing line, small ghost garlands — work well layered in front of a curtain or bare window. The main thing to watch for is placement: keep any strings or hooks well above eye level and clear of a window’s opening mechanism, handle, or lock, so nothing catches when the window is used normally.
Lighting and Projection for Nighttime Impact
Window-safe lighting choices
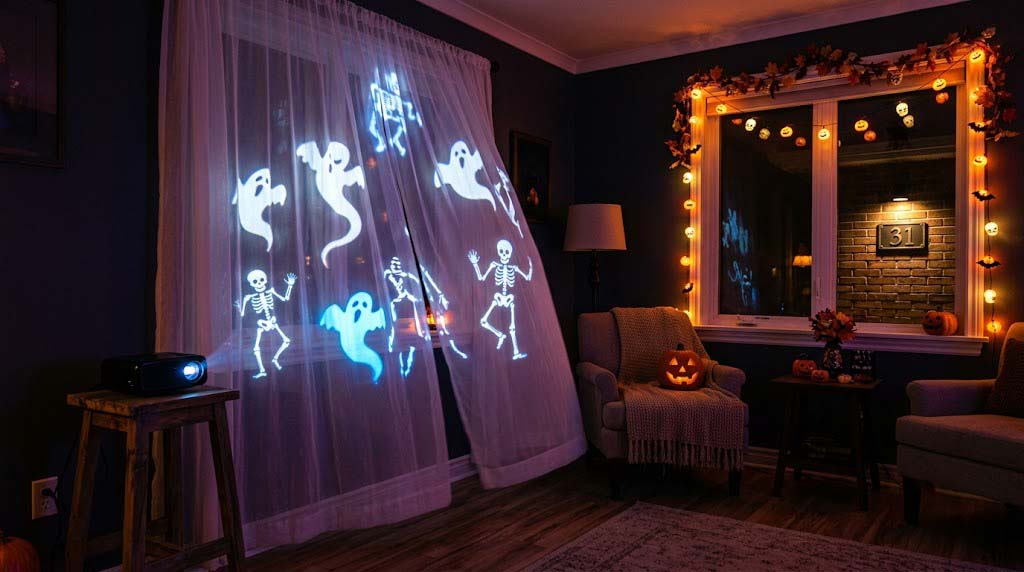
Battery-powered LED string lights are generally the safest option for window use since they avoid running a cord to an outlet across a sill. Plug-in lights and small projectors work well too, but it’s worth confirming they’re rated for the way you intend to use them and that the nearest outlet doesn’t require an extension cord running across a walkway.
Projection effects versus physical decor
Projectors that throw moving ghosts or skeletons onto a curtain or window screen create an effect flat decor simply can’t replicate, but they come with more setup considerations — they need a dark enough surface to project onto, and their visibility depends heavily on how much ambient light is in the room or on the street. We wouldn’t assume a projector is fully weatherproof unless the product listing specifically states it; most are built for indoor or covered use.
Keep the display visible and safe
If you’re using a timer, set it to match when trick-or-treaters are actually likely to be out rather than running lights all night. Keep cords tucked away from foot traffic, avoid angling any light directly at passing cars or pedestrians, and make sure your house number is still visible if the display is bright or busy enough to compete with it.
Weatherproofing, Installation, and Safety
Indoor versus outdoor window placement
Most window decor is designed to sit on the inside of the glass, which keeps it out of the weather entirely. If a piece is meant to go on the outside — some silhouettes and clings are — check specifically whether it’s labeled for outdoor or weather-resistant use, since “weather-resistant” and “waterproof” aren’t the same claim, and a light rain can be enough to loosen an indoor-only product mounted outside.
Mounting without damaging glass or frames
The mounting method matters as much as the decor itself. Lightweight paper or vinyl pieces are usually fine with static cling or painter’s-tape-style adhesive on the frame rather than the glass, while heavier items may need suction hooks rated for their actual weight. Testing a small section first — and choosing the mounting method based on how much sun and heat that window gets, not just the decor’s weight — avoids most of the damage or falling-decor issues people run into.
If you do end up with dried adhesive residue on the glass, a mix of warm soapy water and a plastic razor blade scraper handles most of it; avoid metal blades on tempered or coated glass.
Protect children, pets, and emergency exits
A few safety basics are easy to overlook once the visual side of decorating takes over: keep small or detachable pieces out of reach of young children and pets, route any cords up and out of walking paths, and never let paper or fabric decor rest against a light source that generates heat. If a bedroom window doubles as an emergency exit, avoid covering it completely no matter how good the effect looks.
How to Style Window Decorations With the Rest of Your Home
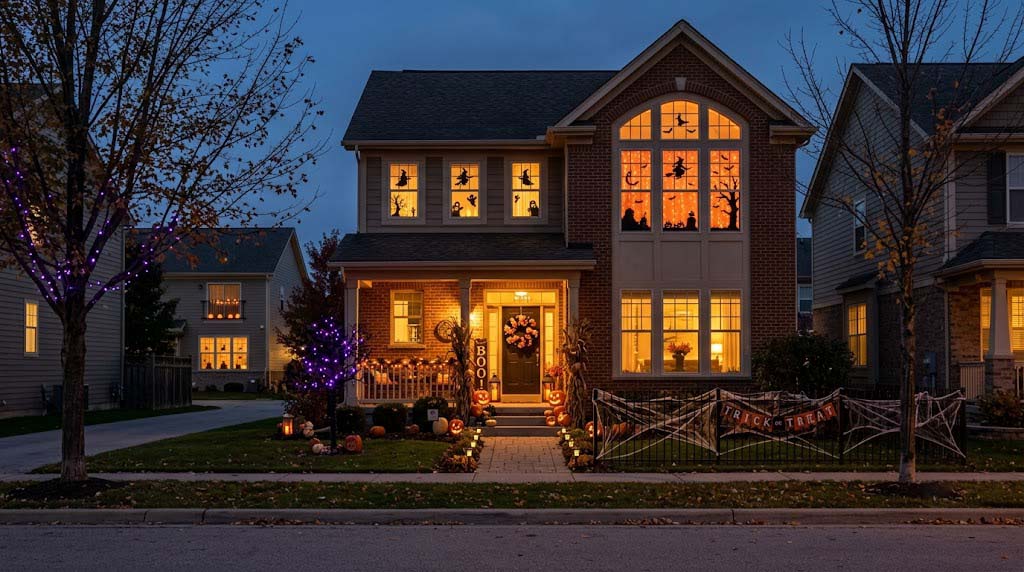
Build one façade story
The most polished-looking setups usually share two or three consistent elements — a color palette, a theme, a recurring shape — between the windows, the porch, and the yard, rather than treating each area as a separate project. If you’re already running animatronics halloween figures near the entryway, picking a window scene that echoes their tone helps the whole front of the house read as one coordinated display instead of several unrelated ones.
Picking a handful of motifs from our seasonal halloween collection and repeating them across the façade tends to read as more deliberate than a window scene that doesn’t relate to anything else on the house.
Balance dark windows with warm accents
Backlit silhouettes and dark curtains create strong contrast, but too many dark windows in a row can make a house front look flat or uninviting rather than festive. Mixing in a few warm accents — pumpkins, warm-toned lights, a lit porch — usually keeps the display feeling balanced instead of just dim.
Adapt the plan for apartments and small homes
Smaller homes and apartments generally do better with one strong focal window than an attempt to decorate every pane. Clings, compact lights, and small curtain panels all work well for this, and concentrating the effort on the window that’s most visible from the street or hallway usually has more impact than a thinner effort spread across several.
Frequently Asked Questions
What are the best Halloween window decorations for a house?
It depends on the effect you want: silhouettes for nighttime impact, clings for a fast setup, curtains for privacy and texture, and lighting or projection for movement. Most well-decorated homes combine two or three of these rather than relying on just one.
How do you make Halloween window silhouettes visible at night?
Place the silhouette between the window and a light source positioned behind it, dim competing lights in the same room, and check the effect from the street to confirm it reads clearly from outside.
How do you hang Halloween decorations without damaging windows?
Use a mounting method suited to the item’s weight and the window’s surface — static cling, frame-mounted tape, or a rated suction hook — and test a small section first rather than committing to the full piece right away.
Are Halloween window decorations safe to leave outside in the rain?
Only if the product is specifically labeled for outdoor or weather-resistant use. Indoor decor, paper pieces, and most electrical lighting shouldn’t be left exposed to rain by default.
What are the best Halloween window decorations for renters?
Static clings, removable decals, and lightweight curtain panels are generally the safest choices, since none of them require adhesive on the glass or frame. It’s still worth checking your lease and testing a small area first.
How do I remove Halloween window decals without residue?
Peel slowly from one corner rather than pulling straight off, and follow the product’s specific removal instructions. Not every decal is guaranteed residue-free, so it’s worth testing a small section before applying it across the full window.
How can I decorate a window for Halloween on a budget?
Cut your own paper silhouettes, try the parchment-paper-and-trash-bag method for a frosted, glowing effect, and focus on a single standout window instead of every pane in the house.