
No products in the cart.

Halloween Gifts
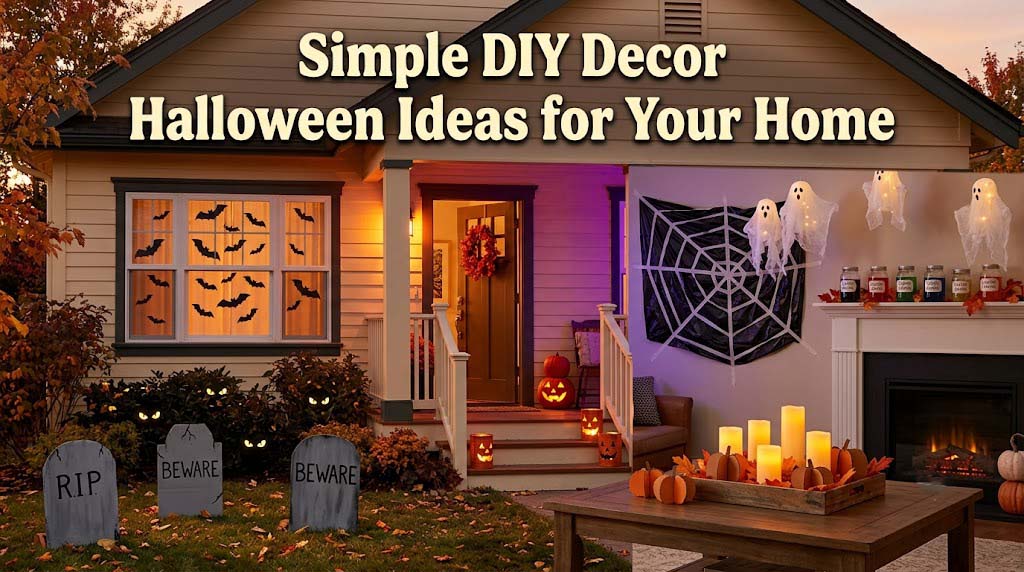
Simple DIY Decor Halloween Ideas for Your Home
22
Sep
Sep
Most of the best Halloween decorations don’t come from a craft store — they come from the recycling bin. A few trash bags, some old jars, and a roll of painter’s tape can go further than a cart full of seasonal supplies, and none of it requires cutting a single stencil by hand. This guide walks through DIY decor Halloween projects organized by where they go in your home, plus the lighting and safety details that separate a display that lasts the season from one that falls apart by the second week of October.
Simple DIY Halloween Decor: Low Effort, High Impact
The “shop your house” approach
Before buying anything, it’s worth doing a quick sweep of what’s already lying around: toilet paper rolls, glass jars from pasta sauce or jam, flattened cardboard boxes, an old white T-shirt, and a roll of black trash bags. Nearly every project below starts with one of these, which means the real cost of most of this list is closer to a can of spray paint than a full shopping trip.
Time and difficulty at a glance
The projects here split roughly into two speeds: things that take ten minutes with scissors and tape, and things that need a few hours of drying or curing time before they’re ready to display. Knowing which is which before you start saves the frustration of realizing halfway through that a ghost needs to sit overnight when you were hoping to hang it before dinner.
Indoor DIY Projects: Walls, Windows, and Mantels
The trash bag spiderweb
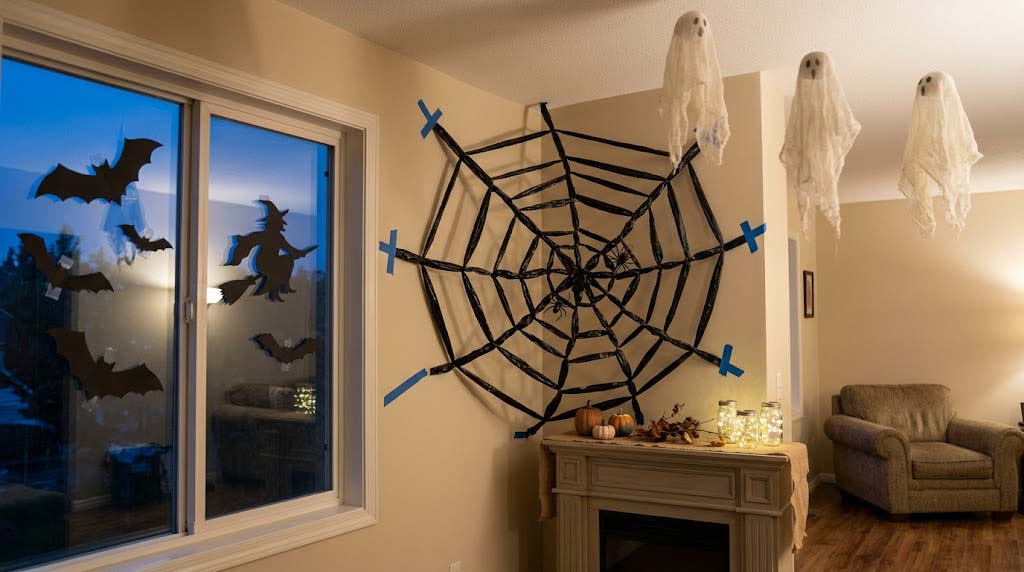
Cut a black trash bag open along one seam, fold it into a triangle, and snip a series of parallel slits from the folded edge toward the open one — unfolded, it stretches into a surprisingly convincing oversized spiderweb. Painter’s tape holds it to a wall or window corner without leaving residue, which makes this one of the safest options for a rental where the security deposit is on the line.
Floating cheesecloth ghosts
Dip cheesecloth in a mixture of liquid starch and water, then drape it over an inflated balloon and let it dry into a stiff, ghostly shape before popping and removing the balloon inside. Hung from a ceiling hook on clear fishing line, the result reads as genuinely floating rather than obviously suspended, which is most of what makes this project feel more polished than a store-bought version.
Spooky silhouette window clings
Black construction paper cut into bat or witch silhouettes and taped to the inside of a window does double duty — it looks intentional during the day and, once the room light goes on behind it after dark, throws a sharp shadow visible from the street. It’s one of the lowest-effort projects on this list and one of the few that actually improves once the sun goes down.
Outdoor and Porch Homemade Halloween Decor
Cardboard tombstones with a faux stone finish
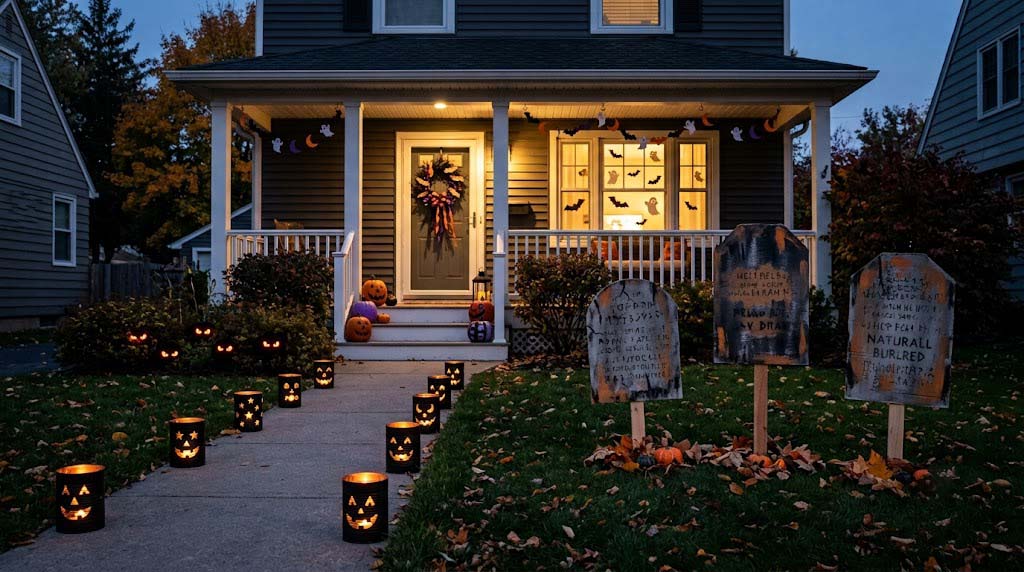
Cut rounded tombstone shapes from flattened cardboard boxes, then mix a bit of baking soda into gray craft paint before applying it — the texture that creates as it dries reads as convincingly stone-like rather than flat and papery. A couple of wooden stakes or dowels taped to the back and pushed into the ground keeps the whole thing upright without needing anything more elaborate.
Glowing eyes in the bushes
Toilet paper rolls cut with a pair of narrow, slanted eye shapes and tucked into shrubs or planters with a small glow stick or battery tea light inside create an eerie, watching effect from the sidewalk after dark. It’s an easy project to scale up or down depending on how many rolls you’ve saved, and it pairs well with the rest of a family display — kids in kids halloween shirts handing out candy tend to get a kick out of pointing them out to trick-or-treaters.
Tin can jack-o’-lanterns
Clean, empty soup or bean cans hammered with a nail into simple jack-o’-lantern faces hold up to outdoor weather far better than paper or cardboard, since metal doesn’t disintegrate in rain the way those materials do. A coat of orange spray paint and a battery tea light inside finishes the look, and unlike most of the projects here, these can genuinely stay out for the whole season without special care.
Tabletop and Centerpiece Crafts

“Poison” potion bottles from recycled jars
Empty jam or pasta sauce jars, cleaned and stripped of their labels, become convincing potion bottles with a few lines of raised trim piped on with a hot glue gun and a coat of black or metallic gold paint once the glue cools. Grouped together on a shelf or mantel in a few different sizes, they read as a cohesive apothecary display rather than a single random jar.
The bloody candle centerpiece
A cheap white pillar candle gets its effect from a second candle — light a red one and let the melted wax drip down the side of the white candle, building up layers until it looks like something out of a haunted mansion. Set on an old tray or a cake stand, it works well as the centerpiece of a table already carrying the rest of your Halloween tablescape, including a halloween table runner if you’re pulling the whole setup together for a dinner or a party.
Lighting and Safety for Homemade Decor
Always light paper and fabric projects with LEDs
Anything made from cheesecloth, cardboard, paper, or an old T-shirt should be lit with a battery LED tea light rather than a real flame — these materials are exactly the kind of dry, thin fuel that catches fire fastest, and a knocked-over real candle near one is a genuine hazard rather than a hypothetical one. Flameless candles have gotten realistic enough in flicker and warmth that the tradeoff barely shows in photos.
Weatherproofing limitations worth knowing upfront
Even with a coat of clear acrylic sealer, cardboard and paper-based projects will eventually fail in sustained rain — sealer slows water absorption, it doesn’t stop it entirely. These projects are best reserved for a deep, covered porch rather than a fully exposed yard, while metal and painted glass pieces like the tin can lanterns handle real outdoor exposure without much fuss.
Building a Cohesive Display
Group in odd numbers and varied heights
A single tombstone or one lonely jar tends to look like an afterthought, while three grouped together at slightly different heights reads as an intentional scene. This is a design trick that costs nothing — it’s purely about how you arrange what you’ve already made rather than making more of it.
Plan for takedown before you build
Projects that use tape, removable hooks, or freestanding stakes come down cleanly at the end of the season, while anything glued directly to a wall or door frame creates cleanup work later. Thinking through how a piece will come off before deciding how to put it up saves a frustrating afternoon of scraping residue once Halloween is over.
Frequently Asked Questions
How do I get hot glue or tape residue off my walls after Halloween?
Warm the residue for about 30 seconds with a hair dryer to soften it, then work a strand of dental floss under the edge and gently saw it loose. A little rubbing alcohol cleans up whatever film is left without needing to scrub the paint.
Why did my cheesecloth ghosts collapse and lose their shape?
This usually means the starch mixture wasn’t concentrated enough, or the ghost was taken off the balloon before it had fully dried. Mixing a slightly thicker solution and letting it cure overnight in a dry spot generally solves it the second time around.
Are toilet paper roll crafts safe to leave outside in the rain?
No — the cardboard tube softens and falls apart almost immediately once it gets wet. The glowing-eyes trick works best on a dry night, or you can wrap each roll in clear cling wrap if rain is in the forecast and you still want the effect.
Can I make any of these projects if I’m short on time before Halloween?
Yes — the trash bag spiderweb and the silhouette window clings are both under fifteen minutes with materials most people already have on hand. If your how many days is it halloween countdown is closing in and you’re down to the wire, those two are the best return for the least effort.
Will spray paint stick to a plastic or metal surface without extra prep?
Metal cans generally take spray paint well with just a light wipe-down first, but a plastic surface often needs a primer coat made for plastic or the paint will chip and peel within days. Checking the paint can’s label for surface compatibility before starting avoids redoing the project.